A Practical SPF DKIM DMARC Test Guide for Email Deliverability
Running an SPF DKIM DMARC test is how you verify your email authentication is set up correctly to shut down spoofing and boost your deliverability. Think of these three protocols as your digital bouncers, making sure your emails are recognized as legit by receiving mail servers. Without them, your most important messages are likely getting lost in spam or rejected outright.
Why Email Authentication Is a Must for Your B2B SaaS
Lost revenue from emails landing in spam is a silent killer for B2B SaaS companies. It's the stuff that doesn't show up on a dashboard. A potential customer signs up for your trial, and your system triggers a welcome email. But if that email fails authentication, it never even hits their inbox.
This isn't just a bungled marketing touchpoint; it's a failed activation. You just lost a future paying customer before they even saw your product. The same risk is lurking at every single stage of the customer lifecycle.
The Real Cost of Bad Deliverability
Just think about the most critical automated emails your platform sends out. Dunning emails for failed payments. Renewal reminders for annual subscriptions. The onboarding sequence that's supposed to showcase your product's value.
When these emails don't arrive, the consequences are immediate and painful: involuntary churn, lost expansion revenue, and a frustrating user experience that kills your reputation.
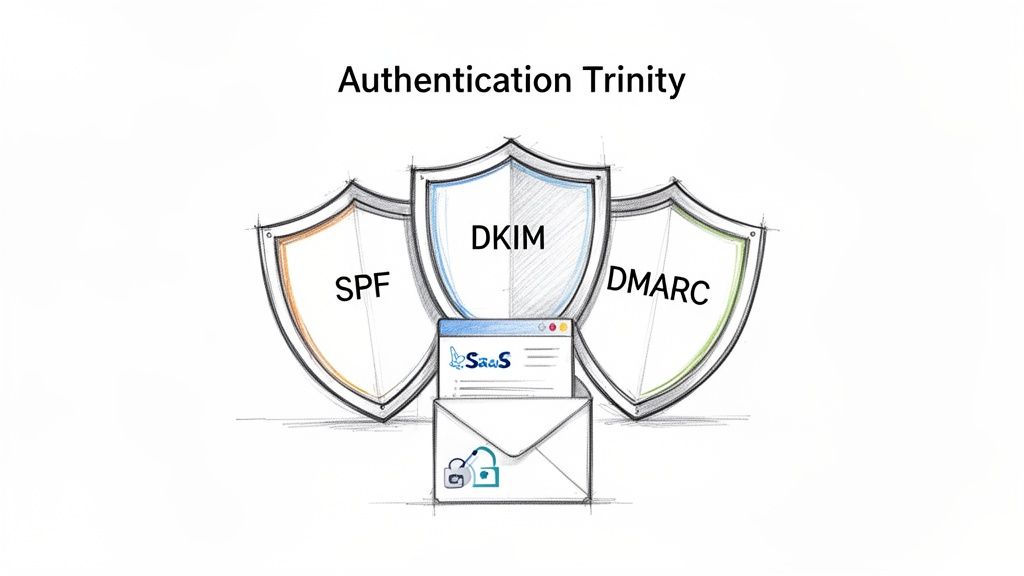
This whole mess often comes down to one thing: misconfigured or missing email authentication records. Without a proper setup, mailbox providers like Google and Microsoft have no way to confirm your emails are actually from you. So, they play it safe and treat your messages with suspicion, shoving them into spam or blocking them entirely. This is where the "Authentication Trinity"—SPF, DKIM, and DMARC—becomes your most valuable asset.
SPF (Sender Policy Framework) is like a guest list for your domain. It tells receiving servers which IP addresses are authorized to send email on your behalf.
DKIM (DomainKeys Identified Mail) adds a digital signature to your emails, acting as a tamper-proof seal that proves the message hasn't been altered.
DMARC (Domain-based Message Authentication, Reporting & Conformance) pulls it all together. It creates a policy that tells receivers what to do with emails that fail SPF or DKIM checks—and sends you reports on what's happening.
Getting these protocols right isn't just some technical chore for the IT department. It's a strategic move for growth. Solid authentication directly builds your sender reputation, which is the ultimate currency of email deliverability.
From Tech Acronyms to Revenue Protection
Treating these protocols as just technical jargon is a huge mistake. They are fundamental to protecting your brand and your bottom line. A huge part of email authentication is defending against email-based threats, and every business needs to understand the practical steps to protect against phishing attacks.
When a scammer spoofs your domain to send out malicious emails, it decimates customer trust and tanks your sender reputation. That makes it even harder for your legitimate emails to get through.
By implementing and regularly running an SPF DKIM DMARC test, you take back control of your email channel. You ensure your most important communications—the ones that drive activation, retention, and revenue—actually reach the inbox. It's a core component of any effective communication strategy, especially when you're following B2B email marketing best practices built for SaaS growth. This guide will walk you through exactly how to test, fix, and monitor your setup to safeguard your business.
How to Run Your First SPF, DKIM, and DMARC Test
Running an SPF, DKIM, and DMARC test sounds way more technical than it actually is. You don't need to be a network engineer or mess around with command-line tools to get a crystal-clear picture of your domain's email health. The entire process is surprisingly simple, thanks to a bunch of free online tools built for exactly this purpose.
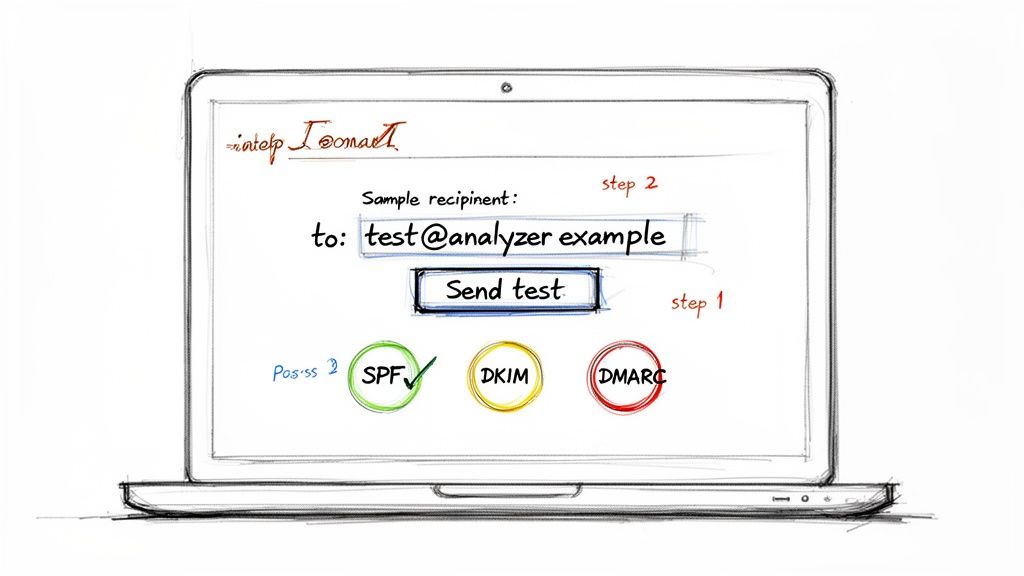
Think of this as a quick diagnostic for your email. You're basically sending a single email from your domain to a special, automated inbox. This service then inspects all the authentication signals attached to your message and spits back a detailed report. It's the fastest way to know if you're passing the same checks that inbox providers like Google and Microsoft use to decide if you're legit.
Before we jump into testing, it helps to have a clear mental model of what each of these protocols actually does. They work together, but each solves a different piece of the puzzle.
Understanding the Email Authentication Protocols
| Protocol | What It Does | Problem It Solves |
|---|---|---|
| SPF | Lists the approved servers and services allowed to send email on behalf of your domain. | Prevents direct domain spoofing by verifying the sending server's IP address. |
| DKIM | Adds a tamper-proof digital signature to your emails, linked to your domain. | Ensures the email's content hasn't been altered in transit, confirming message integrity. |
| DMARC | Tells receiving servers what to do with emails that fail SPF or DKIM checks. | Provides a policy (monitor, quarantine, or reject) and a reporting mechanism for abuse. |
In short, SPF says who can send, DKIM says what was sent is authentic, and DMARC provides the instructions for what to do if either of those checks fails.
Choosing Your Testing Tool
First things first, you need to pick a reliable testing tool. While there are dozens out there, a few have become industry standards because they're simple and give you comprehensive feedback. My go-to options are MXToolbox, DMARC Analyzer, and mail-tester.com. They all get the job done, just with slightly different user interfaces.
The way these tools work is pretty clever. They generate a unique, one-time-use email address just for you. Your job is to send a regular email from your business domain (say, from your.name@yourcompany.com) to that temporary address. The moment it arrives, their servers get to work, dissecting the email's headers, cross-referencing your DNS records, and then displaying the results in a clean, easy-to-digest format.
It's a simple but powerful method for seeing exactly what inbox providers see when one of your emails hits their servers.
Sending the Test Email
Okay, you've got your unique test address. Now what? Just send an email to it.
But hold on—don't just send a blank message with "test" as the subject. For the most accurate results, you need to send an email that's a close copy of what you normally send. Think about your standard email signature, a link or two, and some actual body text.
Why the extra effort? Because DKIM's digital signature covers parts of the message itself, including the body and certain headers. Sending a realistic email ensures the test properly reflects how your real-world campaigns and transactional messages are being signed and verified.
A few quick pointers:
From Address: Make sure it's coming from the domain you want to test (e.g.,
info@yourdomain.com).Email Client: Send it from whatever platform you normally use—Google Workspace, Outlook, or a third-party tool like SMASHSEND.
Content: A typical marketing update or a mock transactional email is perfect.
Once you hit send, pop back over to the testing tool's website. Your report should be ready in a minute or two.
Interpreting Your Initial Results
The results page is your first real glimpse into your setup. Most tools use a simple, color-coded summary: green for pass, red for fail. This is your high-level dashboard.
Here's an example of what a DMARC record check might look like in a popular tool.
This screenshot shows a clean "DMARC Record Published" status, which means the tool found a DMARC policy in the domain's DNS. That's a great start.
You'll get separate verdicts for SPF, DKIM, and DMARC. The goal here is a clean sweep of green "pass" statuses. A fail on any one of them points to a specific problem that needs your attention. For instance, you might see that SPF passes but DKIM fails, or that both are passing but aren't "aligned" correctly for DMARC to pass.
Don't panic if you see red. Honestly, seeing red is the whole point of running the test. Identifying a problem is the first and most important step to fixing it and boosting your email deliverability. A failed test isn't a dead end; it's a roadmap telling you exactly where to focus.
The best part is that the report won't just tell you that a check failed—it will tell you why. This is the gold you need for troubleshooting. It might say your SPF record has too many DNS lookups, the DKIM signature is invalid, or it couldn't find a DMARC record at all. We'll get into decoding these specific errors and their email headers in the next section. For now, this initial test gives you the baseline you need to start making improvements.
Decoding Your Test Results and Email Headers
Running a quick SPF DKIM DMARC test is easy, but making sense of the output is where the real work—and the real value—lies. Your testing tool will give you a simple pass/fail summary, but the clues you need to fix things are buried in the raw email headers. Learning to read these is like learning the secret language of email servers. It's a skill that lets you diagnose deliverability issues on your own.
The summary from a tool is a great starting point, but it's just that—a summary. To truly get to the bottom of a deliverability problem, you have to dig into the details. The headers don't just tell you that a test failed; they tell you why.
From Test Results to Header Analysis
When you first glance at your results, you'll see a verdict for each protocol. Getting a green spf=pass and dkim=pass is what we're all aiming for. But here's a common tripwire: both of those can pass, and your DMARC check can still fail. This almost always comes down to a tricky but critical concept called "alignment."
Alignment is the absolute key to making DMARC work. It's not enough for an email to simply pass an SPF or DKIM check. For DMARC to pass, the domain used in those checks must actually match the domain in the "From" address—the one your recipient sees in their inbox.
SPF Alignment: The domain in the
Return-Pathheader (also called the "envelope sender") has to match theFromheader domain.DKIM Alignment: The domain listed in the DKIM signature's
d=tag must match theFromheader domain.
DMARC only gives a thumbs-up if either SPF or DKIM passes and is properly aligned. This is one of the most common points of failure, especially when you're using third-party services to send emails on your behalf.
Locating Authentication Results in Email Headers
Finding email headers might sound technical, but every major email client makes it pretty simple. In Gmail, for instance, you just click the three-dot menu on an email and select "Show original." Outlook has a similar option, usually under "View message details."
Once you've got the raw header open, you're looking for a specific block of text, usually labeled Authentication-Results. This section is a clean summary added by the receiving mail server, showing you exactly how it judged your email.
Here's a simplified version of what you're hoping to see:
Authentication-Results: mx.google.com;dkim=pass header.i=@yourdomain.com header.s=selector1 header.b=xyz;spf=pass (google.com: domain of sender@yourdomain.com designates 1.2.3.4 as permitted sender) smtp.mailfrom=sender@yourdomain.com;dmarc=pass (p=QUARANTINE sp=QUARANTINE dis=NONE) header.from=yourdomain.com
This little block tells you the whole story. It confirms that both DKIM and SPF passed for yourdomain.com and, just as importantly, that DMARC also passed because the domains were aligned. This is the gold standard.
The Authentication-Results header is your single source of truth. It cuts through the interpretations of third-party tools and shows you precisely what the recipient's server concluded about your email's legitimacy.
Understanding Common Failures Through Headers
Now, let's look at what happens when things go wrong. Imagine you just started using a new marketing tool, but you forgot to add its IP address to your SPF record. The header might show an spf=softfail or even spf=fail. That's your smoking gun—it tells you instantly that the sending server isn't on your approved list.
This kind of misconfiguration is alarmingly common. The data on SPF adoption paints a pretty bleak picture. A Q2 2025 analysis of the top 10 million internet domains revealed that only 36.7% even publish a valid SPF record, while a shocking 61.9% have none at all. This leaves a massive 63.3% of domains wide open to spoofing and the deliverability nightmares that follow.
DKIM failures are another frequent headache, and they can pop up for a few different reasons. You might see a dkim=fail (body hash did not verify) message in the header. This usually means the email's content was altered somewhere in transit, maybe by a forwarding service or an antivirus scanner, which breaks the digital signature.
Or, you might get a dkim=permerror (key not found). This is a dead giveaway that the receiving server couldn't find your public DKIM key in your DNS. It points directly to a misconfiguration with your DKIM selector or the DNS record itself. By finding these specific error messages, you can stop guessing and start fixing the real problem. This hands-on approach to your SPF DKIM DMARC test is what separates the novices from the pros.
Fixing Common SPF, DKIM, and DMARC Configuration Errors
Once you've run your tests and decoded the email headers, you're no longer flying blind. You have a clear diagnostic report that pinpoints the exact weak spots in your email authentication. Think of this as your practical, hands-on guide to fixing the most common failures we see every single day.
We're going to move past the theory and get straight to actionable fixes for specific, nagging problems—like the dreaded 'Too Many DNS Lookups' SPF error, frustrating DKIM signature mismatches, and the simple but costly DMARC syntax mistakes that can torpedo your deliverability.
This flowchart gives you a simple decision tree for navigating email headers to quickly check your authentication status.
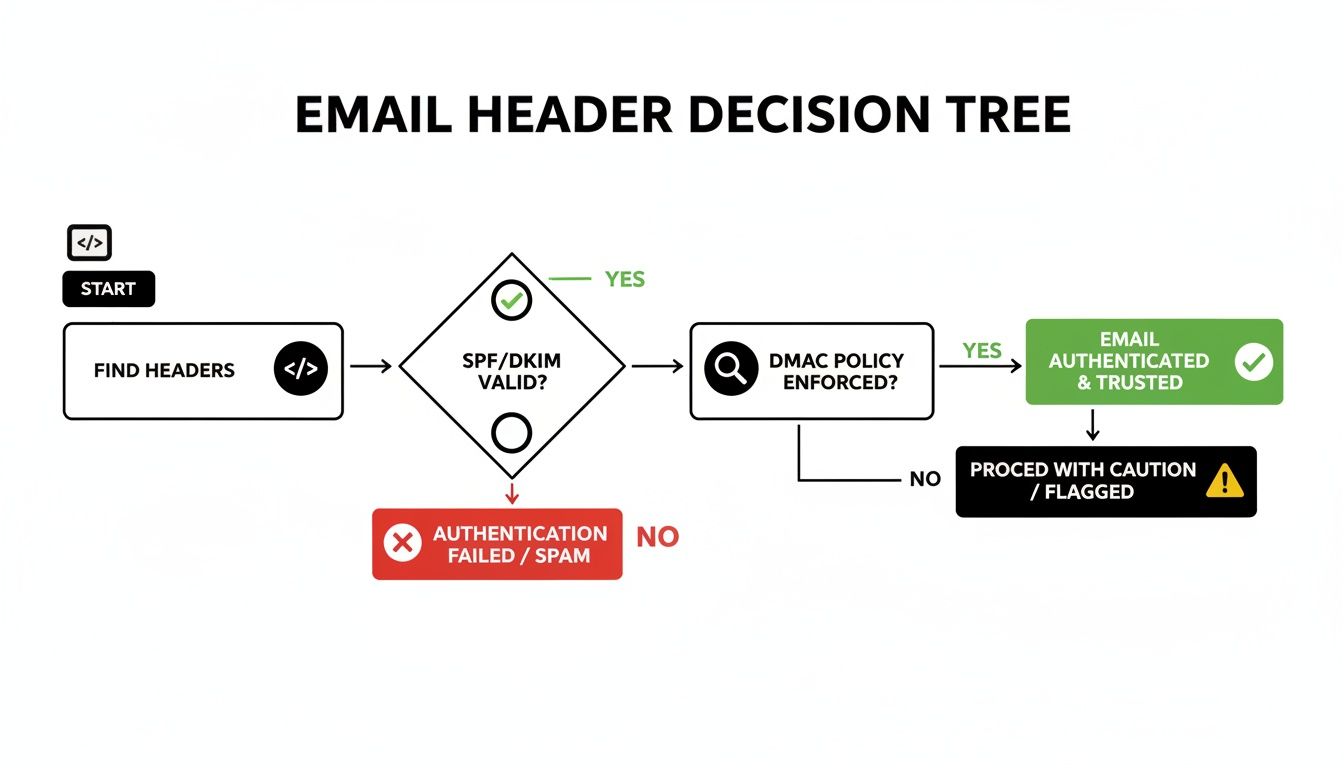
It really boils down to finding the Authentication-Results header, checking the individual SPF and DKIM statuses, and then looking at the final DMARC result to see how it all came together.
Tackling the SPF 'Too Many Lookups' Error
One of the most common—and confusing—SPF failures is the "PermError: Too many DNS lookups" message. The SPF specification is very clear: a single SPF check cannot trigger more than 10 DNS lookups. This isn't just an arbitrary rule; it's a crucial safeguard to prevent DNS-based denial-of-service attacks.
You'll hit this limit faster than you think, especially when you use multiple third-party services that each require an include: statement in your SPF record. Every include: is one lookup, and if any of those records have their own include:, those count toward your limit, too.
The fix is to "flatten" your SPF record. This process involves swapping out the include: mechanisms with the specific IP addresses (using ip4: or ip6:) those services actually send from.
Before Flattening:
v=spf1 include:_spf.google.com include:sendgrid.net include:mail.zendesk.com ~allAfter Flattening:
v=spf1 ip4:35.190.247.0/24 ip4:64.233.160.0/19 ... ip4:198.37.144.0/20 ~all
Pro Tip: Manually flattening an SPF record is a massive headache and it's easy to make mistakes, especially since service providers can change their IP addresses. I'd strongly recommend using an automated SPF flattening tool or a service that gives you a single, managed include: to stay safely under the limit.
Resolving DKIM Signature Mismatches
Another frequent problem is a dkim=fail result, often with a reason like "body hash did not verify" or "key not found." All this means is that the receiving server couldn't validate your email's digital signature.
A few usual suspects are to blame here:
Incorrect Public Key in DNS: This is the big one. A simple copy-paste error when publishing the DKIM key to your DNS is all it takes. The public key in your TXT record must be an exact match to the one from your sending service. One missing character will cause every single DKIM check to fail.
Selector Mismatch: Your DKIM signature includes a "selector" (the
s=tag) that points to the specific DNS record holding the public key. If the selector in your email header doesn't match the one in your DNS, the lookup fails. Double-check that you've published the record with the right selector name, likeselector1._domainkey.yourdomain.com.Content Modification: Sometimes, an email forwarder or an old corporate gateway might slightly alter an email's content or headers in transit. This can break the DKIM signature. It's less common with modern systems, but it still pops up.
Fixing this is all about careful verification. Go back to your email service provider, re-copy the DKIM key and selector, and make absolutely sure it's published correctly in your DNS. If you're still stuck, our guide on what to do if your domain is not verified has more troubleshooting steps specific to the SMASHSEND platform.
Correcting DMARC Policy and Syntax Errors
DMARC records are incredibly powerful, but their syntax has to be perfect. A single typo can make your entire policy useless. The most common errors we see are surprisingly basic, from a misplaced semicolon to using the wrong tag.
Here are a few frequent mistakes to watch out for:
Missing
p=tag: The policy tag (p=none,p=quarantine, orp=reject) is mandatory. Without it, the record is completely invalid.Incorrect Hostname: The DMARC record must be published on the
_dmarc.yourdomain.comsubdomain. Publishing it on your root domain (yourdomain.com) just won't work.Typo in a Tag: Using a colon instead of an equals sign, like
rua:mailto:...instead ofrua=mailto:..., will invalidate that reporting instruction.
And a final word of advice: whenever you make changes to your DNS records, remember that those updates aren't instant. It's important to understand how DNS propagation works to diagnose delays, as changes can take anywhere from a few minutes to 48 hours to be visible everywhere. Always use a validator tool after publishing your record to catch these simple errors before they can impact your deliverability.
Implementing and Monitoring Your DMARC Policy
After you've run your initial SPF, DKIM, and DMARC tests and stamped out any obvious errors, it's time to shift from just analyzing your email to actively protecting it. This is where DMARC starts to really work for your brand, but you absolutely cannot rush this process. Jumping straight to a strict policy is a classic mistake that can end up blocking your own legitimate emails.
The road to full DMARC enforcement is a gradual one. It's designed to give you a complete, panoramic view of your entire email ecosystem before you start telling servers to reject messages. This phased approach is your safety net, ensuring you don't accidentally sever a critical email stream, like your billing system or a third-party marketing tool.
Choosing Your Initial DMARC Policy
Your DMARC policy is set by the p= tag inside your DNS record. This little tag is a powerful instruction that tells receiving mail servers exactly what to do with emails that fail authentication. You've got three options, each one ratcheting up the enforcement level.
p=none(Monitoring Mode): This is your non-negotiable starting point. It tells servers, "Don't do anything to failing emails, just send me detailed reports on all email activity for my domain."p=quarantine(Spam Folder): This policy steps things up by recommending that servers deliver failing emails to the recipient's spam or junk folder instead of their inbox.p=reject(Block): This is the end goal. It's a direct command to servers: completely block and reject any email that fails DMARC authentication.
Starting with p=none is the golden rule. Think of it as a reconnaissance mission for your domain. It allows you to gather crucial intelligence on every single service sending email on your behalf—both the good and the bad—without impacting your deliverability one bit.
Unlocking Insights with DMARC Reports
The real magic of DMARC, especially in the early stages, comes from the reports it generates. This is why the rua tag in your DMARC record is so essential; it specifies the email address where you want to receive these aggregate reports.
These reports show up daily as XML files, summarizing all the email traffic seen from your domain. You could try to read these raw files, but honestly, they're dense and nearly impossible to interpret manually. That's why using a DMARC report analyzer tool is a must. Services like DMARCian, EasyDMARC, or Postmark will parse these reports for you, transforming the data into a clean, human-readable dashboard.
These tools turn a firehose of raw data into actionable insights, showing you exactly which services are sending on your behalf and whether they are correctly authenticated.
A Real-World SaaS Scenario
Let's walk through a common scenario. Imagine you run a B2B SaaS company. You know for a fact that you use Google Workspace for your team's email and SMASHSEND for marketing automation. You set your DMARC policy to p=none and let the reports roll in for a week.
When you check your analyzer tool, you see a few things:
Emails from Google Workspace are passing SPF and DKIM perfectly. Great.
Emails from SMASHSEND are also fully authenticated. Excellent.
But then you see a surprise: emails are also being sent from Zendesk (your support desk) and Stripe (your payment processor), and both are failing authentication.
If you had jumped straight to p=reject, every single support ticket response and payment receipt would have been blocked. Dead on arrival.
The reports gave you the visibility you needed. You could then go into Zendesk and Stripe, find their SPF and DKIM setup guides, and add the necessary records to your DNS.
After a few more weeks of monitoring and confirming that all your legitimate sources are passing authentication, you can confidently switch to p=quarantine and, eventually, to p=reject. Now your brand is fully protected from impersonation.
This careful, step-by-step process is becoming the industry standard for a reason. The growth in DMARC adoption is a direct response to rising phishing threats. A recent study found that DMARC adoption among top global domains surged from 27.2% to 47.7% in just two years—a massive 75% increase. More importantly, the use of actual enforcement policies (quarantine and reject) grew by 50%, showing a clear trend toward active protection.
Your Email Authentication Questions, Answered
Even after you've run a successful SPF, DKIM, and DMARC test, a few questions almost always pop up. You might be wondering about how long things take to update, common mistakes, or what a reject policy really does in the wild.
Let's clear up those final lingering questions so you can feel completely confident in your email security setup.
How Long Does It Take for SPF, DKIM, and DMARC Changes to Take Effect?
This is easily the most common question I get, and the answer, unfortunately, isn't "right away." When you publish a new SPF, DKIM, or DMARC record, you're updating your domain's DNS. That change then needs to spread across the entire internet, a process called DNS propagation.
While you might see the change reflect in some tools within minutes, the official and safe answer is to allow up to 48 hours for it to be fully recognized everywhere. During this propagation window, some receiving servers will see your old record and some will see the new one. My advice? Make these changes during low-traffic periods and keep a close eye on your DMARC reports to confirm everything is working as expected.
Can I Have Multiple SPF or DMARC Records for My Domain?
Nope. This is a hard and fast rule: only one SPF record per domain.
Creating more than one is one of the most frequent setup mistakes we see. It instantly invalidates your SPF and causes authentication failures. If you need to authorize multiple sending services (like your helpdesk, billing platform, and email provider), you must add them all to that single record using the include mechanism.
The same goes for DMARC. A domain must only have one DMARC record. More than one just confuses receiving servers, leading to unpredictable results and failed authentication. Always edit your existing record, never add a second one.
Key Takeaway: When it comes to email authentication, simple is better. One SPF record and one DMARC record per domain. That's the non-negotiable rule for a setup that actually protects your sender reputation.
What Happens If I Set My DMARC Policy to Reject Too Early?
Putting it bluntly: it can be a disaster for your email operations.
If you jump straight to a p=reject policy before you have a complete picture of every single service sending email on your behalf, you will block legitimate mail. The consequences are immediate.
Any email from an unauthenticated source—think a forgotten marketing tool, a new third-party analytics app, or even your accounting software sending invoices—will be flat-out rejected by recipients' mail servers. Your customers could miss critical transactional emails, support replies, or billing notices.
Always, always start with p=none. This "monitoring mode" lets you gather DMARC reports and build a complete inventory of your sending sources. Only after you've confirmed that all your legitimate mail is authenticating correctly should you even think about moving to p=quarantine, and then, finally, to p=reject.
At SMASHSEND, we take the guesswork out of deliverability by automatically configuring and managing SPF, DKIM, and DMARC for you. Ensure your most critical lifecycle emails reach the inbox, not the spam folder, with an email platform built for B2B SaaS growth. Learn how SMASHSEND protects your sender reputation.
🎯 Key Takeaways
Running an SPF DKIM DMARC test is simple using free online tools that generate reports by sending a test email from your domain to their temporary address
Email headers contain Authentication-Results that show real-world spf=pass, dkim=pass, and dmarc=pass verdicts from receiving servers
SPF records have a critical 10 DNS lookup limit—exceeding it makes your entire record invalid and causes authentication failures
DMARC alignment is crucial: domains in SPF/DKIM checks must match the From address domain, or DMARC will fail even if individual checks pass
Start DMARC implementation with p=none (monitoring) to identify all sending sources before moving to p=quarantine then p=reject
Only 36.7% of domains publish valid SPF records, leaving most businesses vulnerable to spoofing and deliverability issues
Frequently Asked Questions
Have a question not in here? Contact us
- How Long Does It Take for SPF, DKIM, and DMARC Changes to Take Effect?
When you publish a new SPF, DKIM, or DMARC record, you're updating your domain's DNS. That change then needs to spread across the entire internet, a process called DNS propagation. While you might see the change reflect in some tools within minutes, the official and safe answer is to allow up to 48 hours for it to be fully recognized everywhere.
- Can I Have Multiple SPF or DMARC Records for My Domain?
No. This is a hard and fast rule: only one SPF record per domain. Creating more than one is one of the most frequent setup mistakes we see. It instantly invalidates your SPF and causes authentication failures. The same goes for DMARC - you can only have one DMARC record per domain.
- What Happens If I Set My DMARC Policy to Reject Too Early?
If you jump straight to a p=reject policy before you have a complete picture of every single service sending email on your behalf, you will block legitimate mail. Always start with p=none (monitoring mode) to gather DMARC reports and build a complete inventory of your sending sources.
- Why Are My Emails Still Failing Authentication Despite Valid Records?
This often comes down to alignment issues. For DMARC to pass, the domain used in SPF or DKIM checks must match the domain in the 'From' address. Even if SPF and DKIM pass individually, DMARC can still fail if domains aren't properly aligned.
- How Do I Fix the 'Too Many DNS Lookups' SPF Error?
The SPF specification limits you to 10 DNS lookups maximum. You'll hit this limit when using multiple third-party services with include: statements. The fix is to 'flatten' your SPF record by replacing include: mechanisms with the specific IP addresses those services use.
- What's the Difference Between SoftFail (~all) and HardFail (-all) in SPF?
SoftFail (~all) tells servers that failing emails are suspicious and should be treated with caution, while HardFail (-all) is a direct command to reject any email that fails the SPF check. Start with SoftFail until you're confident all legitimate senders are authorized.